Overview
link2sd tutorial, many people like using
link2sd to help their device memory, with no exception
Samsung Galaxy Gio user. Alternate is using
simple2ext. In my opinion they both are great applications, however before i found this way i rather like simple2ext because it give me more space in internal memory than link2sd. with this way you can have 100Mb free space in you internal memory and this using link2sd.
Requirement
- Rooted device, without this you cannot use link2sd
- Installed root explorer in you device, if you do not have one download it from here
- Installed link2sd, download it from play store
How to
- When you installing link2sd from play store, you must configure it. if you don't know how please follow this step :
- you must have 2nd active partition, you can use ext2, ext3, ext4 and fat32 for filesystem.
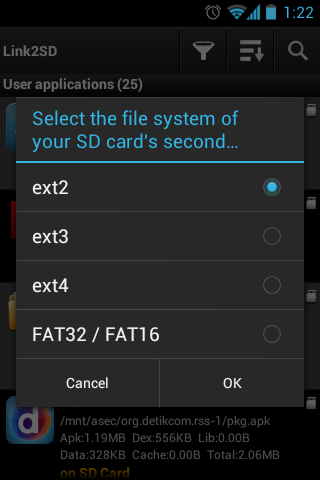
- if this you first time them link2sd will prompt you to create mount script, create it by selection you file system, if you create second partition with cwm then select ext4.
- then click ok, your device will be reboot. if not reboot then please reboot manually
- after reboot you will have link2sd active in you device.
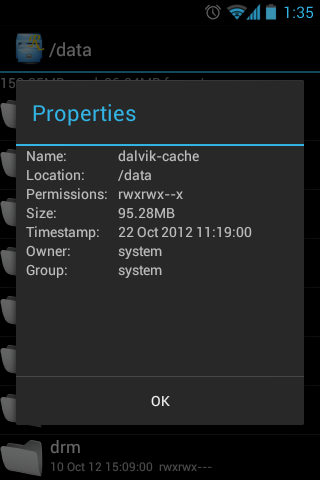
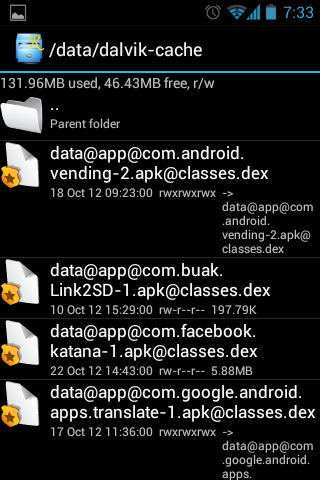
- What make link2sd cannot give more internal space rather than simple2ext is because link2sd does not move dalvik-cache to sdcard, you can see it with your root explorer, dalvik-cache is store in /data/dalvik-cache
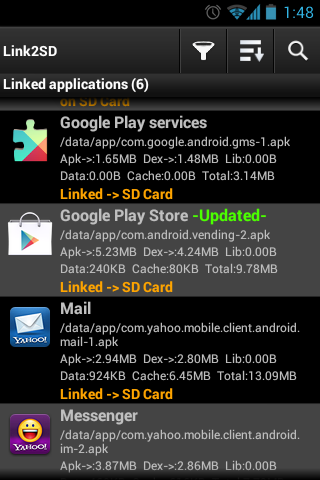
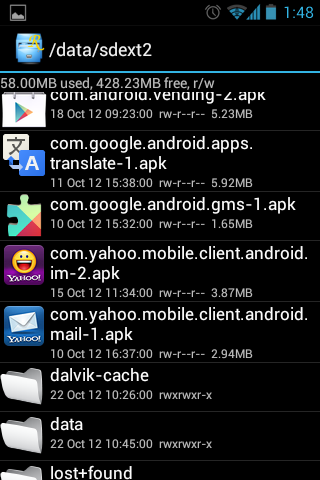
- 95,28MB for dalvik-cache, our trick is move this dalvik-cache to sdcard, when you install link2sd it will create folder /data/sdext2 this folder is mount to your 2nd partition on your sdcard. when you open you link2sd and filter your linked application compare with folder /data/sdext2 you will know that all your link goes to /data/sdext2
- now to give more space to your internal memory our mission is move all moveable dalvik-cache from /data/dalvik-cache to /data/sdext2/dalvik-cache. follow this below step :
- Open root explorer and navigate to /data/dalvik-cache, pick one file with size more then 5Mb, don't move dalvik-cache with first word system@app
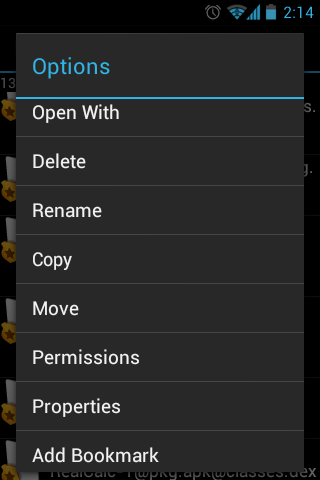
- long press file that you wanna move until it show options menu, select move then navigate to /data/sdext2/dalvik-cache, paste it
- after you paste it long press again on file in the /data/sdext2/dalvik-cache/ and select link to this file and press create link on /data/dalvik-cache/
- if you done with this step i can say you already success moving and linking dalvik-cache to sdcard, if you feel you still need more internal storage then try move as much as you can.
- you can link /data/data to /data/sdext2/data with the same way as above it you think that only move dalvik-cache is not enough.
- Now open link2sd and filter it base on linked application, you will see a list of application that already you link it, in below picture i am link Photobucket, Translate, UberSocial, YouTube cause the have dalvik-cache bigger than 1MB
- As you can see i still have free 46MB for internal storage, but i can make it more if i already done with this method, i must remind you after you link an application dalvik-cache try to run that application to see if it work or not.
- Ok i think it finish, i hope this method can help get more free storage in your internal, remember ALWAYS DO WITH YOUR OWN RISK, ROOT MANAGER CAN DELETE YOUR IMPORTANT SYSTEM FILE SO BE CAREFUL


